Showing posts with label Birthday Parties. Show all posts

Wednesday, March 15, 2017

A Shark Party

Edison is five--FIVE! In our family, when our kids turn five, we offer them a choice between $100 or a party. If they choose the party, they have to stay within the $100 budget and plan it themselves (With mom's help. Mom also has to follow the $100 budget which is very hard to do.)


 For his invitations, we used these shark squirters we found on Amazon. We rolled up the invitation and put them in its mouth. Here's what the invite said:

"Edison is turning FIVE, (we hope you survive...)
It's YOU we invite to stay for a BITE.
(Hold the shark close to your eyes and SQUEEZE tight for a surprise.)

There were two little guys that legitimately squirted themselves directly in the face, to Edison's delight.
Most of what we used for the party we found on Amazon. Love that Amazon.
Edison chose red velvet cake because it looked like BLOOOOOD. 
I used a new vanilla buttercream recipe I found from Cake by Courtney that made my husband want to marry me TWICE. It was so good.
Little Lottie helped me decorate with the blue and white beads.


 My lovely mother-in-law came to my rescue and made this watermelon shark that was a hit. Also, there was only ONE Ken doll in all of Walmart and he now belongs to Edison. He didn't care much about that.

 Fish 'n' chips. Ha!
 Gummy sharks. Simply irresistible for both old and young.


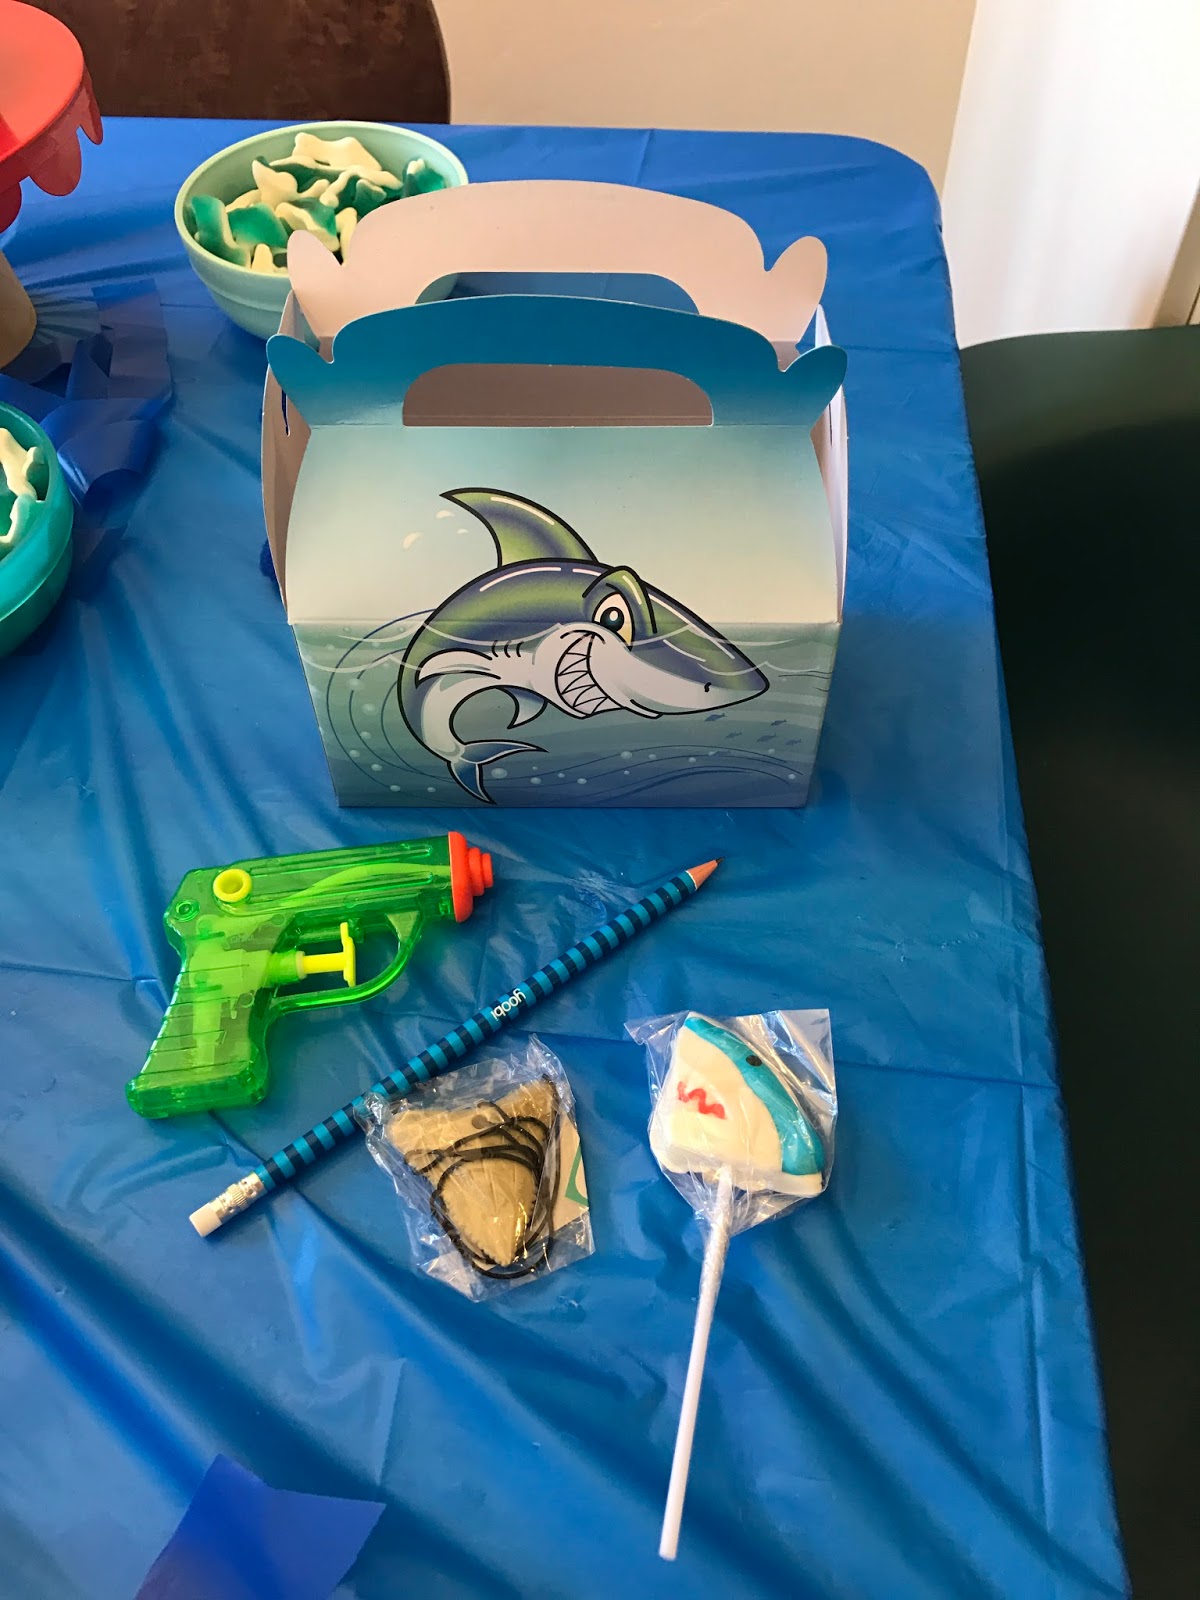
 Goodie bags were pretty simple and the kids LOVED the shark tooth necklaces.
 I had my older girls hide these leftover sharks all over our backyard over at our house so we could walk the kids over and play outside. Did I mention that this entire party was taking place in our 3rd floor 800 square foot apartment? 

 It felt so good outside, I just kept making up more games to keep us outside. I put Hazel on the spot and asked her to work her hula hoop magic.

 Little bit of "Fish, fish, shark..." Then charades, then Shark freeze tag...


 His sister ended up blowing it out for him just before he did. She said she was only trying to help.

 Proof that you can still throw a big party in a tiny space. I love these parties and over the years I've really learned a lot. I've learned to not take everything out on my husband when things go wrong, I've learned to relax and take less pictures and play more. I've bought more and made less, and today I found myself at the bottom of a dog pile of all these little boys and thought, "THIS. This is why it's worth the work."

A special thank you to Vicki, for helping out in countless ways and just for being there.
Happy Birthday sweet boy of mine.
I love you forever.
Related Posts Plugin for WordPress, Blogger...

Monday, June 13, 2011

Birthday Party Ideas: A Mermaid Party

My oldest turned four this month and we decided to have a mermaid party. It was quite a process to come to this decision, actually. After requests such as "A dolphin giraffe party!" and "koala party!" we finally settled with our "under the sea" theme. Here's some of the ideas we pulled together:

Photobucket
I had some sheer blue fabric that we placed over the invites to make them look like they're under water.
Photobucket
I made Hazel this no-sew mermaid skirt that I found here. She loved loved loved it, but it kept falling off and one of the little boys at the party kept stepping on her tail. Beauty is pain.
Photobucket
My mom and I frosted this under-water beauty all morning.
I found the idea on good ole Family Fun, here.
My daughter cut out the pink starfish that were scattered on the table.
Photobucket
Remember Squeeze-its? I loved those. These were called something else, but were the perfect shade of aqua blue.
Photobucket
Starfish brownie pops, also inspired by Living Locurto.
(Eventually they all got faces...)
Photobucket
We used our fish bean-bag toss from a fish-themed party we did two years ago. My mom sewed bean bags out of the cutest fabric. They're peeking out from under the octopus in the next picture...
Photobucket
We did a bean bag toss and played "hot octopus" (hot potato) but the kids got a prize once they were ousted to keep spirits high.

Photobucket
For our last game, we had an "under the sea" scavenger hunt where the clues were inside "bubbles" (balloons) they had to pop. The clues eventually led to a box full of treasure for everyone...
Photobucket
The girls got bracelets and necklaces and there were little sea creatures for the boys.
*I have to admit that this was the low part of the party for me. I wrote down the order of clues on a piece of paper that I accidentally let my 6 month old chew on while I stuffed the clues permanently inside of the balloons. When I asked my husband to hide the balloons and he asked, "Where do they go?" I drew a blank. The chewed-up paper with my hiding spots had been thrown away. I figured I could correct my mistake as we went along, but Hazel was crying because everyone kept stepping on her tail and I didn't realize one of our little guests was old enough to read and she got to the clues before I did--which led her to the wrong places. Let's just say that I finally sent them all outside to the last balloon and had my brother bring out the treasure box to end the whole thing. Some things work out better in my head than in reality...
Photobucket
To top it off, we had a starfish pinata that was finally beat to bits by my fourteen year old brother! All in all, it was a FUN mermaid party and we were so glad to be done...
Photobucket
And all of this was made possible by....my hot mama. Isn't she gorgeous? Seriously, who else could send you back to your closet with an order to put on something more comfy and cool because she knows you'll start to sweat once the kids start spilling their juice on your floor and one of them sneaks into your guest bedroom and jumps on your nice white quilt with dirty feet?
A girl needs her mom. Even when she's all grown up.
Photobucket
Doesn't that look like a happy birthday girl?
After all the guests were gone, we brought up Hazel's present...chickens!
Yep, we have three hardy winter-laying chickens--one for each girl. There's Diego, named after my 2 year old's first love, and Elvis, after Ellie's thick dark hair. And Hazel named her's Rapunzel. We thought that was fitting since she got the hair to match it (from the sweet boy who kept stepping on her mermaid tail).
Related Posts Plugin for WordPress, Blogger...

Wednesday, June 9, 2010

Flower Fairy Party

My daughter turned three this month and it was time to try some new projects for her party. Since she tries to pick every flower she sees, we decided on a flower fairy theme.
The entire party took place outside where we played fairy games, barbequed, and ate out dessert on blankets in the shade.

Invitations:
I found a very creative idea for invitations here and tried it out.

Photobucket
There's a tutorial on Martha Stewart's website that explains how to cut out these flowers using tissue paper. I used more layers to make them thicker and after a few tries, I got the look I wanted. I hooked one end of a pipe cleaner and pulled it through the flower and wrapped the "stem" with floral tape I found at JoAnne's.

My daughter had a hard time giving these up when we delivered them to her friends,
so I made a few extra for her to keep. They make cute decorations for the party if you put them into bouquets, make flower fairy crowns (by linking the pipe cleaners together), or hats.

Pinata:
I decided it was finally time to tackle a paper mache project and make my own pinata.
(Read this post for details.)
Once again, I was inspired by Brooke Reynolds and made my pinata into a flower.

Photobucket

I didn't follow the instructions which suggested wrapping the string around the pinata during the paper mache process for extra reinforcement. My husband came up with a crafty solution described in my pinata post. It's not the prettiest, but it survived a couple beatings before breaking open.

Treats:
Cupcakes are one of my favorite things to bake and decorate.
This flower cupcake idea is now a favorite of mine.
Photobucket


Photobucket
I used Dum-dums instead of those nifty old-fashioned lollipops the Martha Stewart clan use; I couldn't find them anywhere. I also used Airheads for the leaves which worked perfectly.
So cute and very yummy.

For the birthday cake, I used my smallest ceramic mixing bowl to bake a small round cake.
Photobucket

I found my daughter's favorite fairy in miniature size at Walmart for $5, wrapped her bottom half in Saran wrap, and stuck her in the middle of the cake.
Photobucket


Photobucket
Then I frosted her "dress" with a light blue frosting and added some pre-fab frosting flowers I found at JoAnne's.
Photobucket

Photobucket
The first thing my daughter wanted to do was rescue her favorite fairy from all that frosting! She didn't let go of her for the rest of the day
(until she accidentally dropped her into the toilet that night).

Decorations:
I saw this idea on TV and thought it might work for a birthday banner. You use coffee filters and you can spray paint them or decorate them however you want. I used one of my small vials of "fairy dust" and made a ring around each die cut letter (mine had sticky backs).
Instead of messing with string, I hot glued them to my fence!
Photobucket

(I would tell you that they pull right off and you can keep them, but I just realized that they are still outside, glued to my fence. Oops.)

Photobucket
Photobucket
I placed my "Fairy Princess" letters above the face painting table on the deck.

Photobucket
I asked a young woman in my neighborhood to come and face paint, which helped give the kids something to do between games or when they were done with their food.

Games:
I printed pictures of various flower fairies from the official Flower Fairy website and had a very patient gentleman at FedEx make them big enough for little ones to spot them around our yard.
Then we had a fairy hunt!

Photobucket

We also played "Fairy, Fairy, Troll" (instead of Duck, Duck, Goose)
and played with balloons, trying to keep them off the ground as long as possible.
At the end of the party, everyone got a fairy wand or whistle (for the few boys)
and a vial of fairy dust.
Photobucket

Photobucket

For the adults, we brought out our Bag-o (or Corn hole) game my husband made last year.
If you or your husband is handy, it's worth making this game yourself. It's addicting!

Please share your birthday party ideas with me!
Related Posts Plugin for WordPress, Blogger...

Tuesday, June 8, 2010

paper mache pinata

I must admit that paper mache has always intimidated me a little bit. I figured there was some crazy concoction you had to brew just right and several days of waiting and drying, etc...
So I hesitantly decided to make my own pinata for my daughter's 3rd birthday party, telling myself in the back of my mind that if all went wrong, I could always just go to the party store and buy one. And I'm glad to say that I survived.

1.Inflate balloon & tear your strips
It's best if you use a round balloon. I wanted mine to be extra large, so it ended up
more oval than I wanted. Tear newspaper into 1 1/2" strips. They recommend doing three layers, so you can use adds or flyers that are colored for the second layer so you don't get confused.

Photobucket
*I know this picture says "cut your pieces" but I meant "tear" them. They lay flatter that way.

2. Make your paste
Mix two parts water, one part flour in a pan. I would whisk them in the pan first and then turn on low/med heat because if it heats up too quickly, it's a mess. Heat for 3-6 minutes until it thickens just a bit. Remove from heat and pour into a bowl.

*You can also use starch.
Photobucket

3. Cover your strips with the paste
Dip the strips into the paste and wring them out between your fingers or on the edge of the bowl. Here's where your toddler can help you make a huge mess of your kitchen.
(After about ten strips, I lied and told her we were all done. Then I finished it later.)

Photobucket

4. Let it dry
"They" say that if you use this cooked paper mache recipe, you can place all three layers at once without letting each layer dry separately. I did 2 1/2 layers (I got tired) and they dried just fine, but it did take about 24 hours.

Photobucket

5. Fill with candy
Cut a small flap in the bottom of the balloon. The balloon will shrink so you can pull it out and fill the pinata with candy. Tape your flap shut with masking or clear tape.

Photobucket

6. Decorate
I cut out small petals with a 4" base that I taped upside down onto the pinata. Once I finished one row, I flipped them over so the tape was hidden.
(Note: this part took FOREVER. Just to let you know)

Photobucket

7. Secure string
So here's where I messed up. You should tie a string around your pinata between layers two and three, securing it with masking tape where you need to. At midnight, that was WAY too complicated for me to do, so I skipped it. Thus, my final pinata has half of a hanger stabbed through the top of it so we could hang it. So take it from me, secure your string between your 2nd and 3rd layer of paper mache and save yourself the hassle!

Photobucket

Best of luck with your future pinatas!


Related Posts Plugin for WordPress, Blogger...