
I have to admit that I was in quite a BAD MOOD when we started this activity. But I knew I wanted to have activity time with my girls or else I'd feel guilty, so I sat down and got started with my four year old. My little two year old, Charlotte started making an elf with us but soon had a tantrum. She was then placed in front of Dora while Hazel and I resumed our activity. After about five minutes, I felt relaxed and probably could have made fifty-two of these little elves if my baby hadn't woken up! It may seem like a tedious craft, but if you have a little one who's willing to work at it with you, it's a bit addicting and even calming.

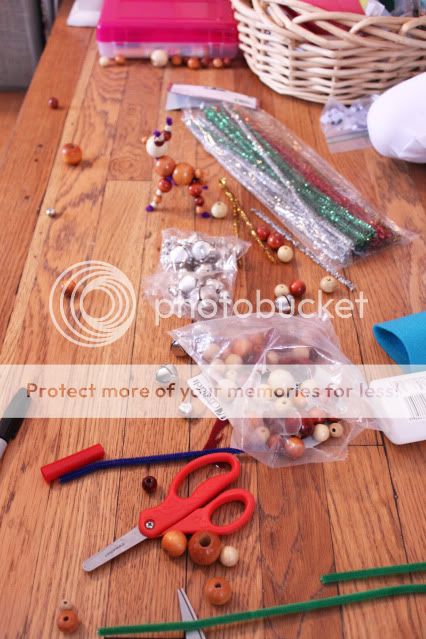
Materials:
pipe cleaners
small and large wooden beads
jingle bells
felt
scissors
hot glue
permanent marker
Step One: You build the elf by taking one pipe cleaner and folding it in half. Then thread the material onto the stem until about halfway down, in the following order: large bead for the body, another large bead for the head, a felt hat and a jingle bell.

Step Two: To make the hat, fold a 1 1/2 inch
semi-circle from point to point to make a cone and secure with hot glue.
Make sure you leave a little hole at the top of the hat for the pipe
cleaner to poke through. After you place the bell at the very top, you
can create a loop with the remaining pipe cleaner to hang the elf on
your tree, if you want.

Step Three: Once you've threaded the body, head, hat and bell, divide the remaining halves of the folded pipe cleaner at the bottom to create two legs. Thread the smaller beads onto the legs and make a loop at the bottom (the feet) to secure the beads in place.

Step Four: Cut half of a new pipe cleaner and center it in between the body and head bead of your elf, twisting it into place to create the arms. Thread your smaller beads and secure with a loop at the ends (the hands).

Step Five: To create the scarf, cut a 1/2" by 4" rectangle from your felt. Fringe the ends with scissors and cut a lengthwise slit 1 3/4" from one of the ends for the opposite end to slide through. And you're done!
After we made a few elves, my four year old decided that she wanted to make a reindeer for one of the elves to ride on. Since we were on a roll, I was up for the challenge. We merely gave him two body beads and placed the second 1/2 pipe cleaner between those two beads for his front legs. Then I hot glued a nose on his head bead and a tail on the lower body bead. We cut the loop at the top to create antlers.


